Voice Channel
“Materials in this manual have been reproduced with the permission of Persistent Systems, LLC, Copyright © 2026. References to Wave Relay® are made with the permission of Persistent Systems, LLC, the sole owner of the Wave Relay® registered trademark and Wave Relay® technology, and do not constitute or imply endorsement by the United States Government.”
Overview
How to configure 3rd party Push-to-Talk (PTT) settings — microphone, earpiece, transmit mode, checktones, low battery notification, and channel selection — and how to use Wave Relay® PTT and Flash Override, sourced from the official MPU5 Basic Operator Manual (Part V: Device Operation).
Manual Reference
Open Audio Configuration
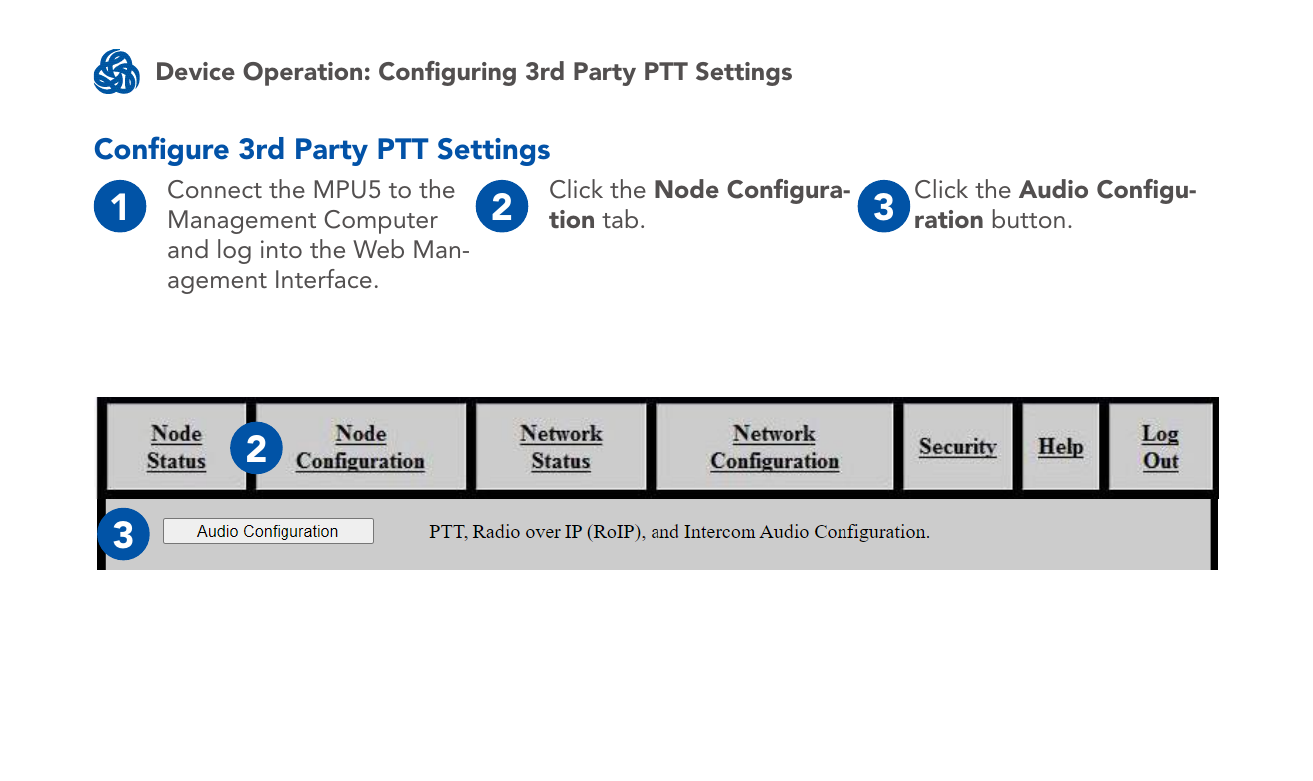
- Connect the MPU5 to the Management Computer and log into the Web Management Interface.
- Click the Node Configuration tab.
- Click the Audio Configuration button.
Enable Push-to-Talk and set microphone level
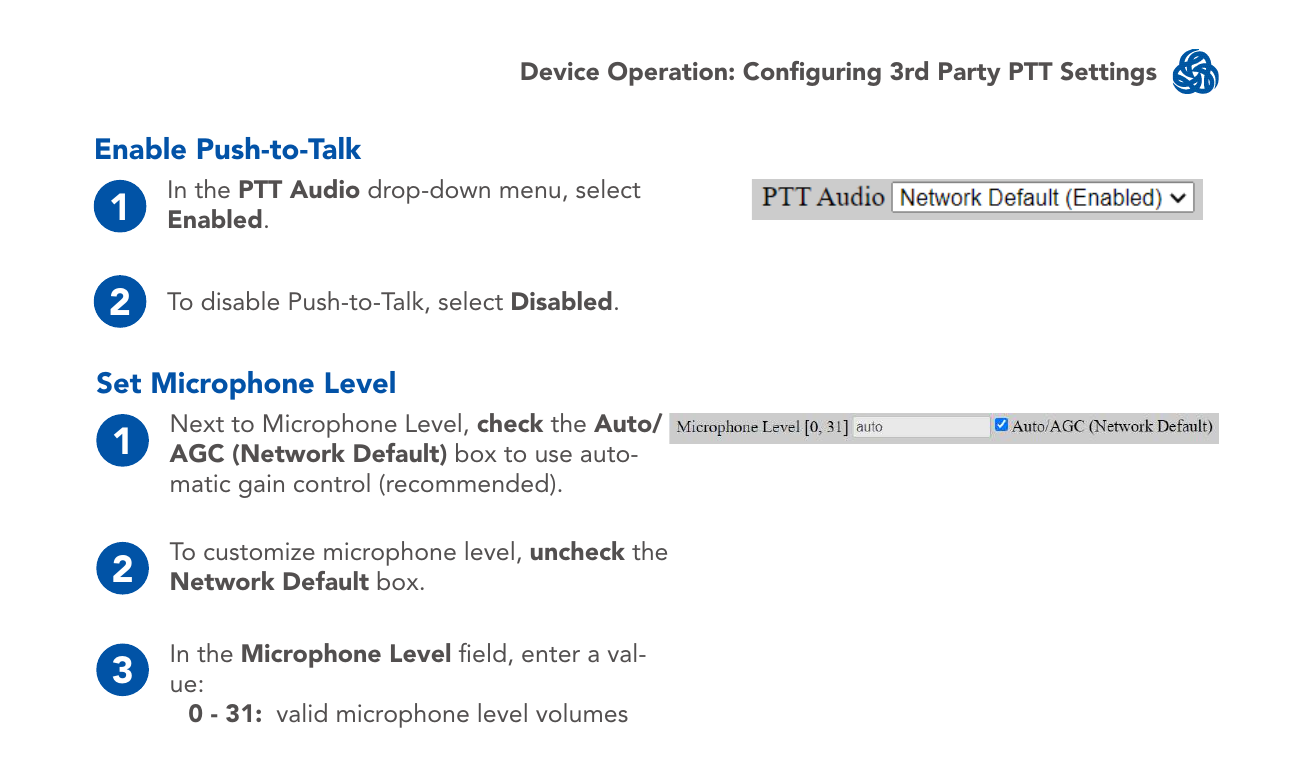
- In the PTT Audio drop-down menu, select Enabled. To disable Push-to-Talk, select Disabled.
- Next to Microphone Level, check the Auto/AGC (Network Default) box to use automatic gain control (recommended).
- To customize microphone level, uncheck the Network Default box and enter a value in the Microphone Level field: valid volumes are 0–31.
Set earpiece volume
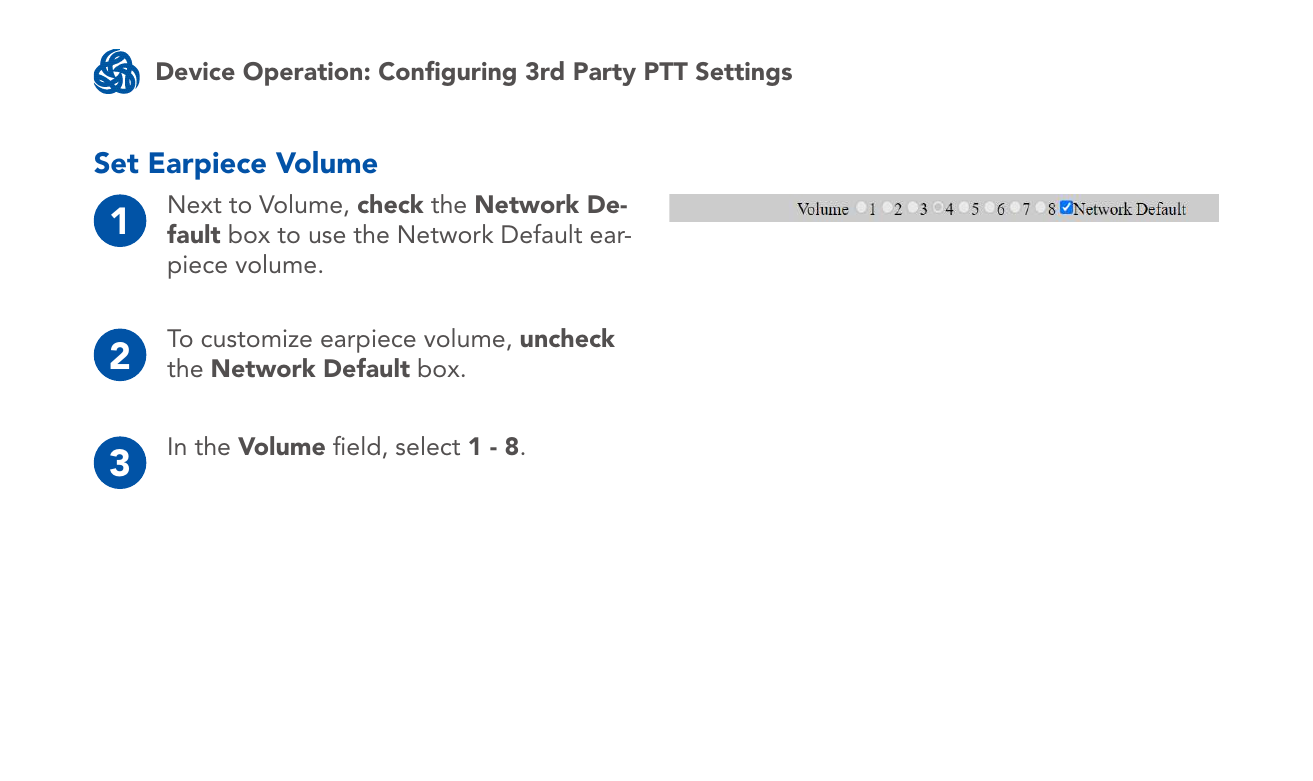
- Next to Volume, check the Network Default box to use the network default earpiece volume.
- To customize earpiece volume, uncheck the Network Default box.
- In the Volume field, select 1–8.
Set transmit mode
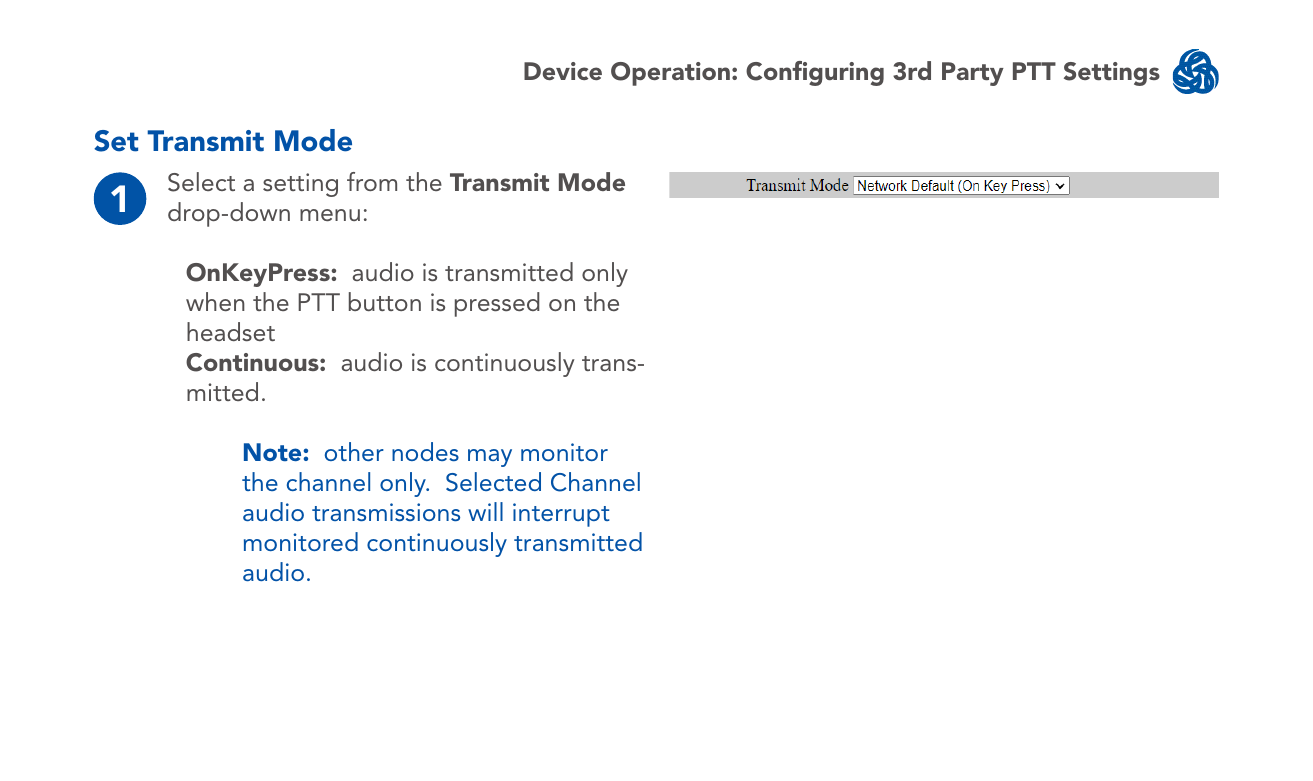
Select a setting from the Transmit Mode drop-down menu:
- OnKeyPress — audio is transmitted only when the PTT button is pressed on the headset.
- Continuous — audio is continuously transmitted.
Note: other nodes may monitor the channel only. Selected Channel audio transmissions will interrupt monitored continuously transmitted audio.
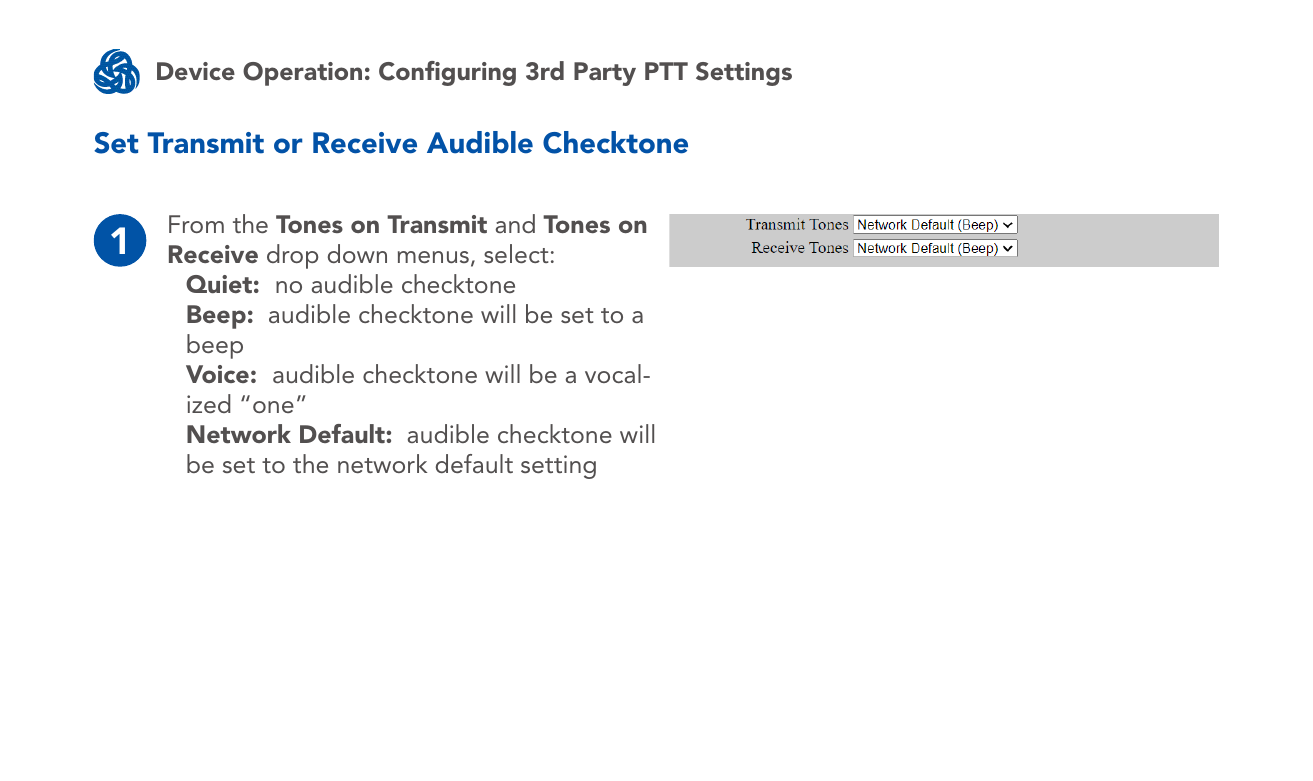
Set transmit and receive checktone
From the Tones on Transmit and Tones on Receive drop-down menus, select:
- Quiet — no audible checktone
- Beep — audible checktone set to a beep
- Voice — audible checktone is a vocalized "one"
- Network Default — audible checktone set to the network default setting
Enable/disable low battery audible notification
Select a setting in the Low Battery drop-down menu:
- Enabled — when the battery is depleted to 5%, the node plays an audible notification every 5 minutes.
- Disabled — no low battery audible notification occurs.
- Network Default — network default setting.

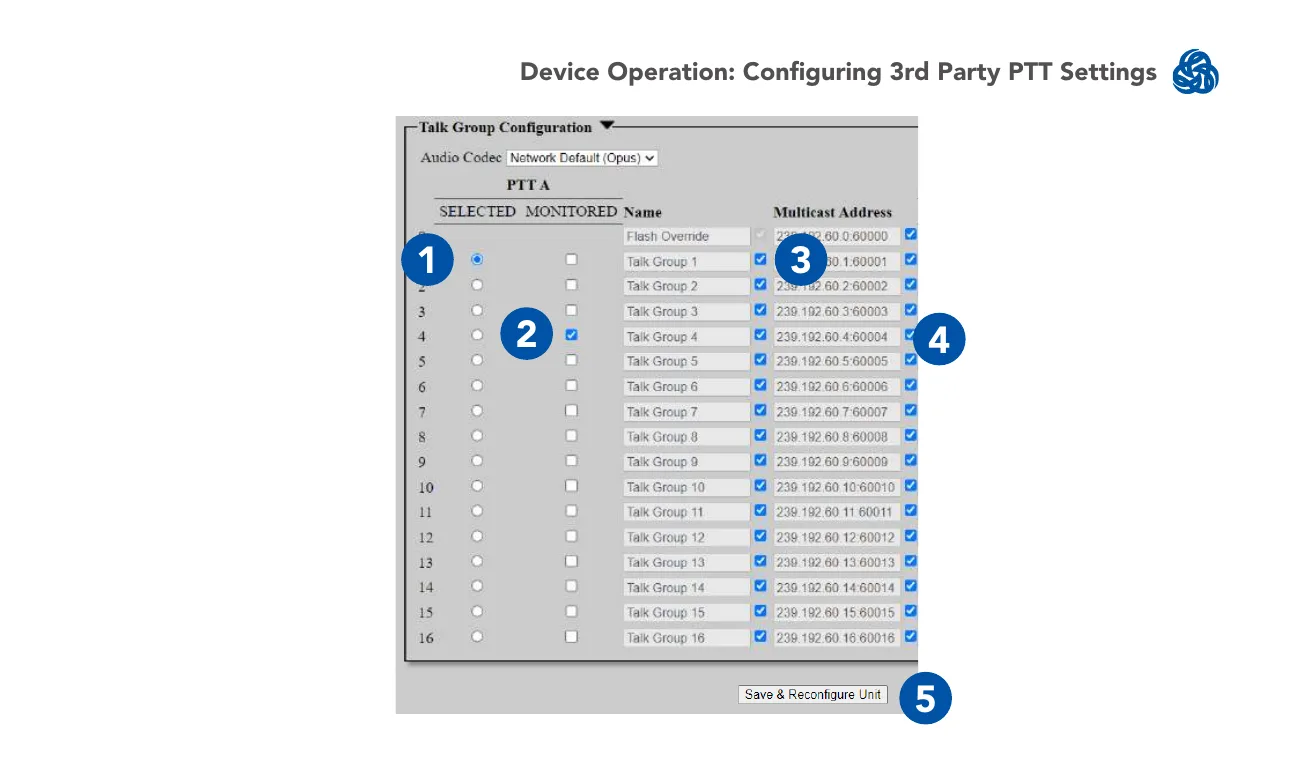
Selecting and customizing channels
- In the Selected column, click the circle for the channel(s) you wish to transmit on.
- In the Monitor column, check the box for each channel you wish to monitor — you'll be able to hear PTT audio on monitored channels.
Pro Tip: you may monitor any number of channels, but you can only transmit on the one channel selected in step 1.
- To customize a PTT channel, uncheck the Network Default box in the Channel field and enter the desired channel name.
- Uncheck the Network Default box in the Multicast Address field and enter the desired multicast address and port in the form
<multicast address>:<multicast port>.
Note: valid multicast address values are 224.0.0.0–239.255.255.255, valid multicast port values are 1–65534, and each channel must have a unique multicast address and port.
- Scroll to the bottom of the page and click Save & Reconfigure Unit.
Using Wave Relay® Push-to-Talk
- Ensure that your PTT device is connected and channel settings have been configured properly and as desired.
- Press and hold the PTT button on the PTT device.
- Wait to hear a single beep.
- Talk.
- Release the PTT button when you are finished talking.
- You may talk or listen, but not both simultaneously.
- Transmissions from an individual user are broadcast to all other users on the network using the same channel.
- Only one person may talk on a channel at a time — if you try to PTT while another user is transmitting, you'll hear a busy signal.
- Selected Channel audio will interrupt Monitored Channel audio.
- Flash Override audio will interrupt both Selected Channel and Monitored Channel audio.
Using Flash Override
Flash Override lets a user transmit audio to all nodes on the network regardless of which channel they're operating on. Flash Override audio interrupts all audio on all channels.
- To activate Flash Override, "tap-tap-hold" the PTT button — press and release the PTT button quickly in succession, then press and hold for the duration of the transmission.
- The transmitting user and all receiving users will hear three beeps.
- Talk.
- Release the PTT button when you are finished talking.
Source
MPU5 (WR-5100) Basic Operator Manual, v3.2, 03EN073 Rev. P — Part V: Device Operation, pages 116–125.