Plugin Configuration in ATAK
Overview
Covers installing and configuring the Somewear ATAK plug-in, which lets you use a Somewear Hotspot for over-the-horizon communication via satellite when terrestrial coverage isn't available, directly from your ATAK end-user device (EUD).
Prerequisites
- The Somewear ATAK plug-in installed on your EUD.
- A Somewear Hotspot, charged.
- A Somewear workspace key (emailed to your workspace admin) if this is your first time joining a workspace from ATAK.
Steps
Hotspot controls
The Hotspot has three physical controls, plus a USB charging port, on its housing:
- SOS — remove the cap over the top button and hold it for 6 seconds to activate SOS.
- Power — hold the power button for 3 seconds to turn the Hotspot on.
- USB Charging — connect a standard Micro USB cable here to charge the Hotspot.
- Antenna — the Somewear logo side; see Orient the Hotspot below.
On the ATAK screen, the plug-in shows:
- Status Pill — signal strength, battery life, and current transmission status.
- Battery Life — the Hotspot's charge level, 0-100%.
- Tracking Indicator — whether tracking is currently on or off.
- Status Bar — the serial number of the paired Hotspot, plus signal strength, battery life, and transmission status.
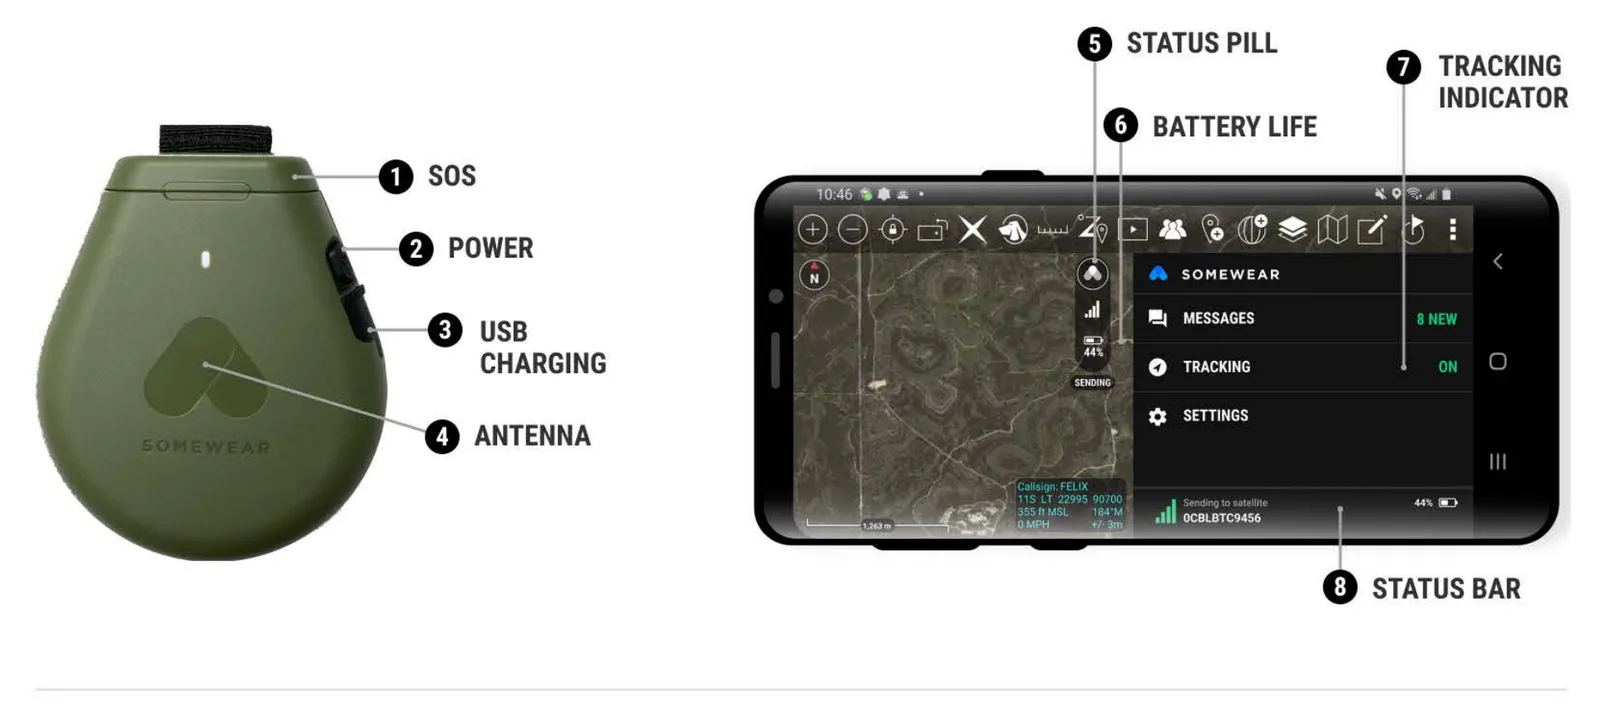
SOS sends an emergency distress alert. Only activate it for an actual emergency.
Pair your EUD to the Hotspot
- Verify the Somewear ATAK plug-in is installed — a status pill icon reading Pair Hotspot should be visible on screen.
- Put the Hotspot into pairing mode: make sure it's off, then hold the power button until the LED flashes white once every second.
- Tap the Pair Hotspot icon in ATAK. Once paired, the status pill expands to show signal strength and battery life.

- Confirm the serial number shown in the plug-in's status bar matches the serial number printed on the back of your Hotspot. If it doesn't match, tap the status bar to disconnect and repeat pairing.
Orient the Hotspot
Place the Hotspot in its pouch with the Somewear logo facing outward, toward the sky — the power button and USB port should be exposed. Shoulder height is the optimal placement. Avoid tall buildings and dense foliage, which obstruct the line of sight needed for signal strength.
Charge the Hotspot
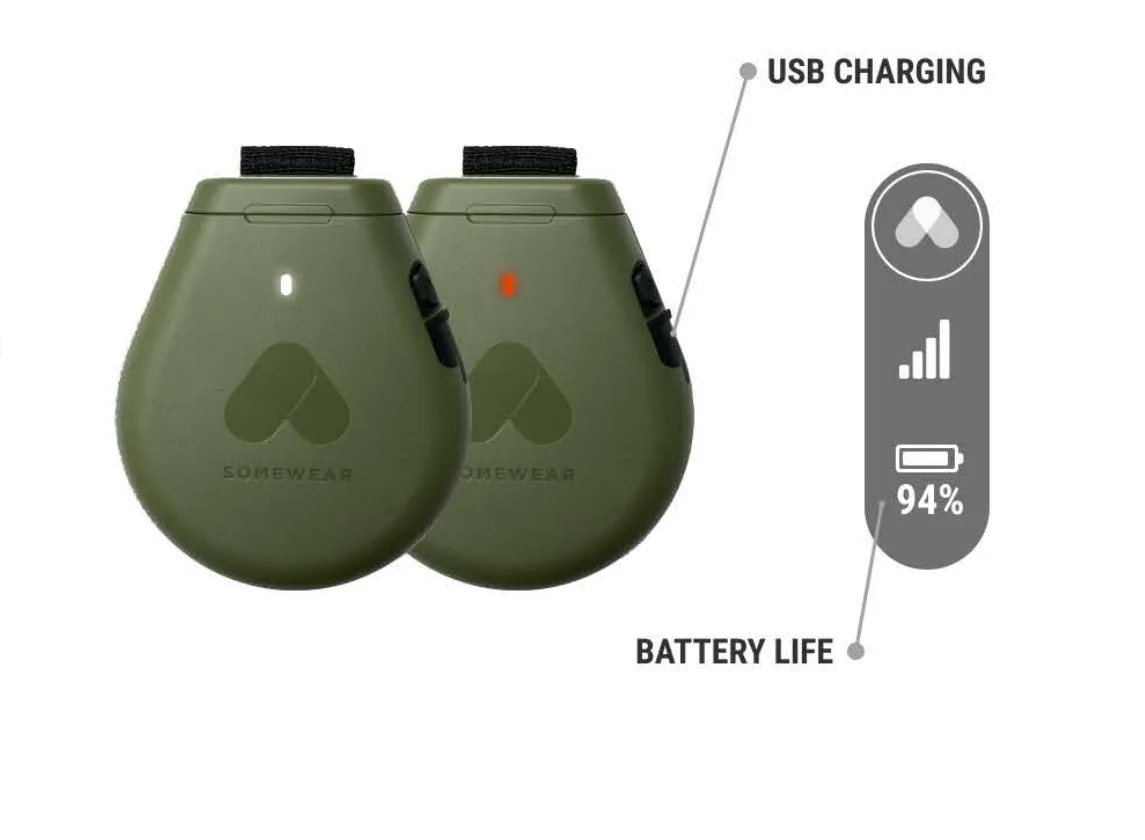
The Hotspot charges with a standard Micro USB cable — 0-100% takes about 60 minutes. Its LED indicates charge and power status:
| LED | Meaning |
|---|---|
| Blinking white | On |
| Blinking white, once per second | Pairing mode |
| Blinking red | On, low battery |
| Solid red | Charging |
| Solid white | Fully charged |
The Hotspot's battery level is also shown in the ATAK plug-in's status pill.
Join or switch workspaces
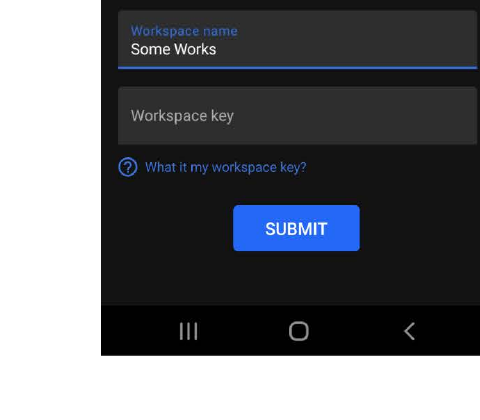
Workspace keys let you join and add workspaces from within ATAK. They're emailed to the workspace admin when the workspace is created and should be distributed to members from there.
Add a workspace:
- Open the Somewear plug-in in ATAK and tap Settings.
- Tap the Workspace dropdown and select Add Workspace.
- Enter the workspace name and workspace key.
Switch to a different workspace:
- Open the Somewear plug-in and tap Settings.
- Tap the Workspace dropdown and select the workspace you want from the list.
Turn tracking on or off
- Ensure your Hotspot is connected (status pill is expanded).
- Navigate to the plug-in's main screen and tap Tracking.
- Toggle Tracking to ON. Tracking begins immediately.
- To change how often your location reports, tap the tracking interval dropdown and select a value — the fastest is 15 seconds, the slowest is 1 hour.
Tracking only works while your Hotspot is paired. Pair it before turning tracking on or changing the interval.
Reading the tracking map
Once tracking is on, three icons appear on the ATAK map:
- Current Location — your own live position.
- Last Shared Location — the last position your team actually received from you over the Somewear plug-in.
- Other Team Members — your teammates' latest shared positions.
Share shapes and markers
- After creating a shape or marker in ATAK, select it.
- From the radial menu, open the shape/marker's details, select Send, then Broadcast.
- Select the Somewear group or contact to share it with.
- Recipients get a notification in the workspace chat they can tap to view the shape/marker on their own map.
Check settings and versions
Under the plug-in's Settings screen you can view your current workspace, toggle Satellite Encryption, and check your Plugin Version and Firmware Version to confirm you're up to date.
Troubleshooting
- Serial number mismatch after pairing: tap the status bar to disconnect, then repeat the pairing steps — this usually means you paired to the wrong nearby Hotspot.
- Tracking toggle won't turn on: confirm the Hotspot is paired first (status pill expanded) — tracking is disabled entirely while disconnected.
- Don't know your workspace key: it was emailed to your workspace admin when the workspace was created — ask them to resend it.