Overlay Manager
Overview
Reference material for Overlay Manager in WinTAK, sourced from the official WinTAK 5.7 Software User Manual (26 March 2026).
Manual Reference
Overlay Manager organizes map objects, files and overlays into categories and subcategories, providing a common location to control their visibility on the map.

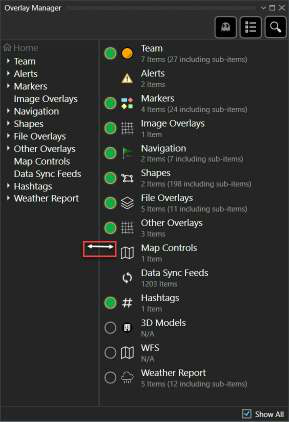
Select the Overlay Manager icon to open the list of categories. These include: Teams by color, Alerts, Markers, Image Overlays, Navigation, Shapes, File Overlays, Other Overlays, Hashtags, 3D Models, and Web Feature Services (WFS). Plug-in specific overlays are appended to the end of the list when the plug-in is installed.
The Overlay Manager is shown in a tree view on the left side of the screen. Selecting a category opens a detailed listing of the items available in that category. The available items within each category are annotated on the menu entry, allowing the sub-menu to be referenced. The Overlay Manager panels can be adjusted by hovering the mouse over the middle of the panels until the left-right arrow appears, then click and drag to the left or right as desired.
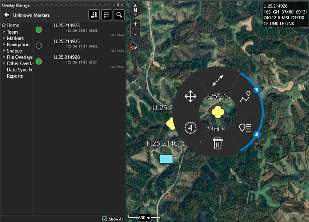
When a displayed item in a specific category is selected, the map view will pan to that item and its radial will open.
Item details and visibility
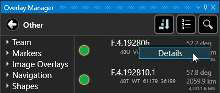
Right clicking a specific item and selecting Details will open the item's details panel on the right side of the map without panning the map to that item.
Category and item visibility is toggled on and off with the circular radio buttons. When the circle appears green, the corresponding layer objects are visible. A hollow circle corresponds to a category, along with its subcategories, that are not visible.
When the Show All checkbox is unchecked, the map items listed will be filtered based on the current map view.
Search
Specific overlays and items can be searched for by selecting the Search icon in the main Overlays pane. Select specific categories of overlays to narrow search results.

Sort
The Sort feature is accessible at the lowest level of a category if it contains multiple items. Sort selected overlays within a given category either alphabetically or by proximity to the Self-Marker.

Common Operating Picture (COP) Refresh
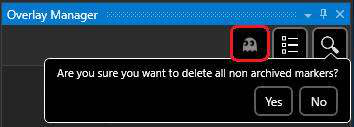
Selecting the Common Operating Picture Refresh button will remove all temporary items from the map. This includes Self-Markers and SPIs from other users, and ADSB Aircraft Tracks.
Hashtags and Sticky Tags
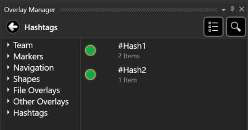
Hashtags and Sticky Tags can be added to map items to aid in categorizing and searching for items.
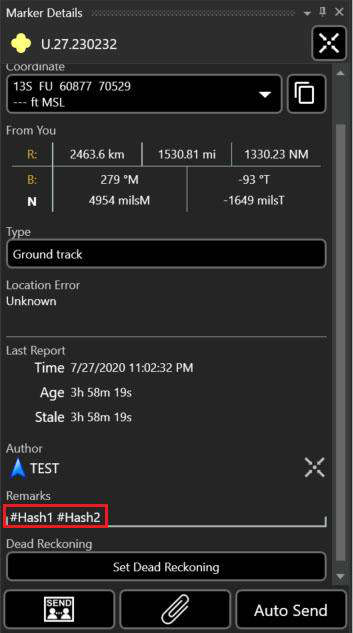
Hashtags can be added to map items in the Remarks field of the Details window.
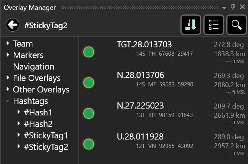
To add a sticky tag, select the hashtag icon located in the Placement section of the toolbar. Enter a name and select + to add that sticky tag to all subsequently placed map items. More than one sticky tag may be added. To discontinue adding a particular sticky tag to subsequent items, select the hashtag icon again, then select the Delete icon associated with the sticky tag.

To view map items that have hashtags associated with them, select the Hashtag category within the Overlay Manager. Select the desired hashtag and all tagged items will be listed. If one of the tagged items is selected, the map will pan to that item and its radial will display. Right-clicking an item and selecting Details will display that item's details panel without panning to the item on the map.
Multi-Select Export and Delete
The Multi-Select Tool provides the ability to export overlays in multiple file formats. Following the export, the file may then be sent to one or more TAK users. This tool is also the primary method to delete objects, attachments and files.

Export Files
Overlay items can be exported in several file formats that are saved in C:\Users\username\Documents\WinTAK\Export\. This location can be changed as well. Supported file formats include GPX, KML, KMZ, and SHP.
Items exported as a Data Package will be saved in C:\Users\username\AppData\Roaming\WinTAK\Data Packages\.
In addition, items can be exported directly to an ATAK device through ATAK Manager by selecting the Push to ATAK Device option. If a Cloud or FTPS Server is configured, items can be uploaded to the server by selecting Upload to Cloud.
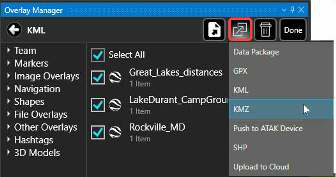
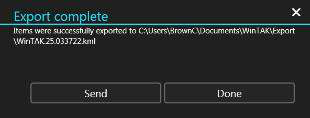
To export Overlay items, select the Multi-Select icon and choose the items to include. After the selections have been made, select Export and choose a file format from the drop-down menu. A system navigation window will open asking to enter a file name. Enter a name and select Save to create the file, which will be followed by a notification that the file was successfully exported. Select Send to send the file to one or more TAK users or Done to close the window.
Send Previously Exported Files
To send a previously exported file, select the Export Previous File icon. Choose the desired file from the list and Open. Select the network recipients in the Contacts window and then Send.

Delete Overlay Items
To delete an existing overlay item, select the Multi-Select icon. Items may be selected as a category (Markers, Shapes, etc.) or individually. Select the Delete icon to remove all items selected.

Create KML/KMZ
KML/KMZ files that have been imported into WinTAK can be modified to create new KML/KMZ files.
New KML or KMZ files can be created by selecting Overlays > File Overlays > KML. Select the Edit (pencil) icon and choose to either create KML or create KMZ. Once the format type has been selected, enter the name of the file, select Save, then select the file name that appears in the list in Overlay Manager and select Edit to begin editing.
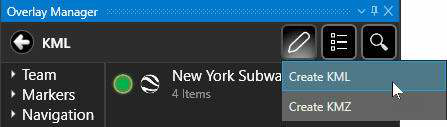
While editing, markers/shapes can be placed directly on the map or folder(s) can be created to organize the data added to the map. KML placemarks can be added to new or existing KML/KMZ files by navigating to Overlay Manager > File Overlays > KML and selecting an existing KML/KMZ file. An edit button will be available. Selecting it will present a drop-down with options to Add Folder, Add Marker or Add Shape.
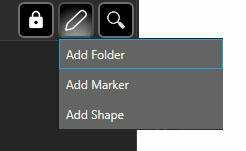
Selecting Add Folder will launch a prompt to name the new folder. Select Add Marker to place a marker on the map and Add Shape will begin the shape creation process that is similar to the Drawing Tools controls for creating a polyline/polygon.
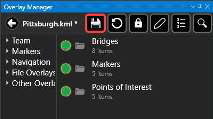
The asterisk next to the file name denotes that there are unsaved changes. The changes can be saved at any time by selecting the Save (floppy disk) icon.
Once the KML has been saved it will be locked from editing. Select the Unlock button to make more modifications.

Edit KML/KMZ
KML placemarks can be moved or edited when the KML is unlocked for editing. Right click on an existing marker, then click an alternate location on the map to relocate the marker. Fine Adjust movement is also available on the radial menu. To change the styling of a marker, select the Details option on the marker's radial. From the DETAILS tab, the marker's icon and name can be modified. Markers can be clamped, relative or absolute to the ground. If relative or absolute is chosen, altitude can be added from DTED (if installed) or entered manually. If the Extend to Ground checkbox is checked, a line will be added from the marker to the ground. To remove a marker, select the Delete option on the marker's radial option.

Shapes can also be modified while in edit mode. Select the Edit option on the shape's radial menu and draggable movement handles will appear that can be used to move a vertex of the shape. Open the Shape's DETAILS tab to modify the shape's name, color and opacity (for closed polygons). To remove a shape, select Delete on the shape's radial.
KML/KMZ with Lasso Tool
The Lasso Tool can be used to either capture map items and export them into a new file or to remove items from an existing KML/KMZ.
An existing KML/KMZ file can be modified using the Lasso Tool. To begin editing an existing KML or KMZ select Overlays > File Overlays > KML, select the desired KML/KMZ to be modified and select the Unlock icon.
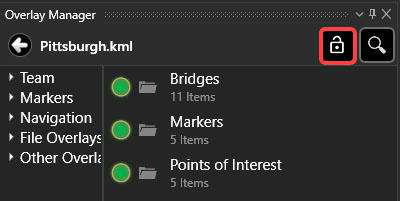
After unlocking, select the Lasso Tool and circle the desired items on the map.
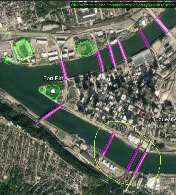
Overlay Manager will then present a screen listing the items included in the Lasso selection. At this point, the items can either be exported into a new file or can be deleted from the existing KML.
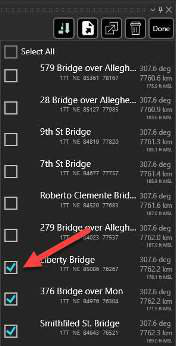
To export the selected items into a file, select the Export icon, choose the format for the new file, enter a file name and then select Save. The file will be saved in the desired location and can also be sent to other users.
To remove the selections from the existing KML after using the Lasso, select the Delete icon and confirm the deletion.
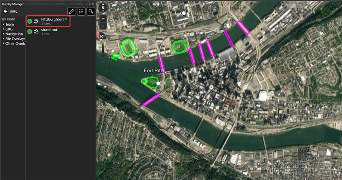
The listing will show an asterisk next to the name. Select the KML name to drop into the options and Save the KML. Choose either Save to overwrite the original file or Save As to save to a new KML file.
KMZ from Image
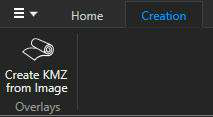
Create a KMZ from imagery by selecting Overlays > Image Overlays. Select the Edit (pencil) icon, then select Create KMZ from Image. For convenience, this function can also be accessed from the main WinTAK toolbar under the Creation tab.
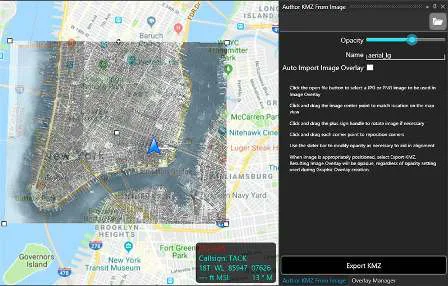
Once the Author KMZ From Image screen is opened, select the Folder icon in the upper right corner. Use the file explorer to navigate to an image and then select an image to import (JPEG or PNG formats are supported). The images are placed at the current center position on the map. Adjust the image by dragging the corners and adjust the opacity of the image by using the slider.
When the image is appropriately positioned, select the Export KMZ button to create the saved KMZ from image file. Regardless of the opacity setting used during the adjustment of the image, the resulting Image Overlay KMZ file will be opaque.
If the Auto Import Image Overlay checkbox is selected, the KMZ file that was exported will be processed and appear on the map. The KMZ will be listed in Overlays > Image Overlays.
Alerts
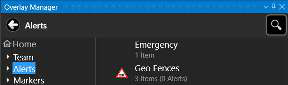
The Alerts category contains Geo Fence alert notifications and Emergency alerts. Geo Fence alerts can be edited or deleted. Emergency Alerts can be deleted.
Navigation
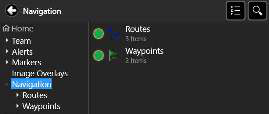
The Navigation category lists Routes and Waypoints that are created from the Point Dropper > Mission Specific > Waypoint option. Selecting a Route or Waypoint pans the map to that item.
Other Overlays
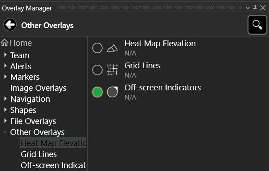
The Other Overlays Category allows Heat Map Elevation, Grid Lines and Off-Screen Indicators to be enabled or disabled on the map display.
Source
WinTAK Software User Manual, Version 5.7, 26 March 2026, pages 38–46.