Route Planning and Navigation
Overview
Reference material for Route Planning and Navigation in WinTAK, sourced from the official WinTAK 5.7 Software User Manual (26 March 2026).
Manual Reference

The Routes Tool provides the capability to create, view or modify existing routes. Select the Routes icon to activate the Route tool. Existing routes will be listed with the following options: Details, Navigate, Edit and Delete.

Importing a route

To import a route, open the Routes Tool and select the Import icon. Navigate to the location of the saved routes (in KML, KMZ or GPX format) and select the desired route. The route will be imported and displayed on the map.
Creating a route
To create a new route, open the Routes Tool and select the + button. Enter the initial parameters: color, method of movement (driving, walking, etc.); Infil or Exfil, Primary or Secondary; and Ascending or Descending Checkpoints.
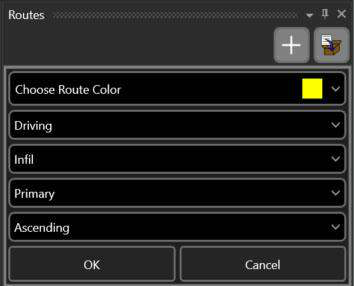
Select OK and follow the onscreen instructions for route creation, starting by selecting a location on the map to begin the route. Long press/right click to create Checkpoints along the route, left click or single tap for vertices.
Select Undo to reverse any changes. When finished, select End Editing. Once the End Editing button is selected the route details panel opens. Checkpoints will be listed in a table showing the distances to each Checkpoint.

Route details, cues and attachments
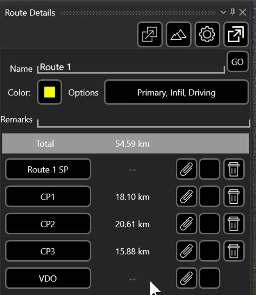
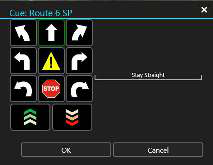
Add route cues to a checkpoint by selecting the button to the left of the Delete button for that checkpoint row.
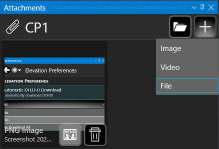
Add attachments to a checkpoint by selecting the Attachments (paperclip) icon to the left of the route cue button. A navigation window appears to browse files. Images attached to a checkpoint will trigger the billboard pop-up feature during navigation of the route.
If other file types besides images are attached to a checkpoint, there is no visible indication of these types of attachments while navigating. If an image is attached to a CP when navigating a route, once the Self-Marker is within the defined bubble radius for the type of route being navigated, the image will pop-up and then be removed once the Self-Marker moves past the checkpoint.
To display the route elevation profile, select the Elevation Profile button in the upper right corner of the route details panel. This tool displays the route elevation profile details if DTED is available. Information such as Total Distance, Max Altitude, Min Altitude, Gain and Loss are displayed in the profile. Check the Show Viewshed checkbox to place a viewshed indicating line of sight visibility along the route. Moving the blue slider dot along the Elevation Profile moves the viewshed along the route on the map, indicating visibility from that location.
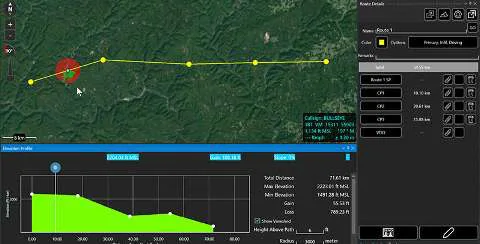
Exporting and editing routes
WinTAK supports route exports in KML, KMZ or GPX file formats. Selecting the Export button exports the file to the /Documents/WinTAK/Export folder. Exported routes can be sent to selected recipients on the network or broadcast to all available recipients.
The route radial menu options are Delete, Clamp to Ground, Navigate, Edit and Details (with quick send from sub-radial). To enter editing mode, select the Edit button from the route details panel or the route radial menu.
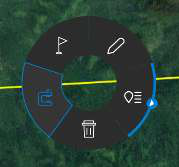
While in edit mode, select and drag a portion of a route segment to create a new vertex. Click a checkpoint or vertex to see radial options for those points. Delete, Fine Adjust, Range and Bearing, Enter Coordinate, Add Checkpoint and Add Cue are available radial options. A deleted checkpoint will become a vertex. A vertex can be changed into a checkpoint.
Routes can be customized in Settings > Tools Preferences > Route Preferences or by selecting the Adjust Route Settings icon at the top of a route details panel.
Navigation

To start navigation, select Route Navigation from the listing in the Route tool window. This will open the Navigation window and draw a range and bearing line from the Self-Marker to the starting point of the route. Navigation information will be updated as progress is made toward the specified location on the map.
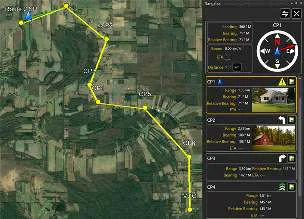

Select the Navigation Flag icon from the route radial menu to start navigation at the beginning of the route. The Navigation Flag can also be selected from a checkpoint's radial menu to begin navigation to that checkpoint rather than the beginning of the route.

The Auto Zoom feature within the Navigation panel continually sets the map zoom to keep the Self-Marker and the next checkpoint within view. Select the Auto Zoom icon to toggle the feature on or off. If the map is manually zoomed in or out during navigation, the Auto Zoom feature will be toggled off automatically.

The order in which the checkpoints are being navigated can be reversed during navigation by selecting the Reverse icon.
To modify the checkpoint currently being navigated to, select the navigation flag on the specific checkpoint panel. The panel will be highlighted, and the navigation will switch to the selected checkpoint. Each checkpoint panel contains information about that specific checkpoint including: Route Cue, Range, Bearing, ETA and attached image.
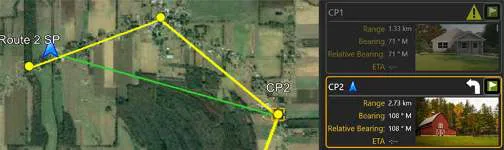
Once the Self-Marker reaches a checkpoint, route navigation will indicate that the checkpoint has been reached, will automatically switch to the next checkpoint on the map and will highlight the next checkpoint in the navigation panel. To end navigation simply close the navigation panel.

Route Simulator Navigation
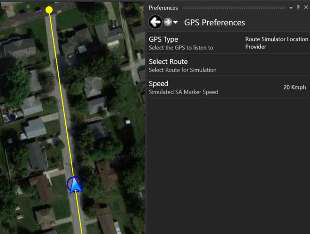
The Self-Marker can be set up to simulate following a route by selecting the Route Simulator Location Provider option available in Settings > My Preferences > GPS Preferences > GPS Type. Select the Route Simulator Location Provider option, select OK, then select a route on the map to follow and enter a simulated speed.
If the simulated Self-Marker reaches the end of the selected route, it will loop back to the beginning of the route. The simulation will continue, even after an exit and restart, until the GPS Preferences > GPS Type is changed.
Billboard Pop-up Feature
While navigating a route, the billboard feature displays images associated with any markers and checkpoints along the route that have attached images. As the Self-Marker approaches a marker or checkpoint with an attached image, the image associated with that marker or checkpoint will pop up once the Self-Marker is within the defined bubble radius for the type of route being navigated. The bubble radius distances can be viewed or changed in Settings > Tool Preferences > "Route Type" Checkpoint Navigation Bubble Radius preferences. The image remains displayed until the Self-Marker has passed the marker.
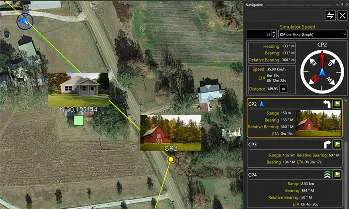
To use the simulation in conjunction with the billboard feature, navigate to Settings > My Preferences > GPS Preferences > GPS Type, select Route Simulator Location Provider, then select OK. Use Select Route to choose the route that will be simulated and then set the speed. Using the Routes tool, or by locating the route on the map, launch route navigation with the route currently being simulated. The Self-Marker will move at the selected speed along the route and billboard pop-ups will appear.
Source
WinTAK Software User Manual, Version 5.7, 26 March 2026, pages 28–32.