Setting Up an EUD without Knox Enrollment
Overview
This guide walks through provisioning a new Android end user device (EUD) into Watchtower using the manual enrollment path — a six-tap gesture that opens the device's own built-in QR scanner, rather than Samsung Knox Direct Enrollment's cross gesture. Use this path when your device isn't going through Knox Direct Enrollment (see Setting Up an EUD with Knox Direct Enrollment for that path instead).
Once the device is enrolled, granting Watchtower Mobile its permissions, letting Watchtower's automation install and configure your MCHMR apps, and installing apps from the catalog and setting up your home screen all work the same way regardless of which enrollment method you used — this guide covers those shared steps too, and points back to the Knox guide for the final catalog/home-screen steps rather than repeating them.
Prerequisites
- A new or factory-reset Android device.
- The Watchtower enrollment QR code from your Apex Edge administrator.
- A Wi-Fi network and password, in case the QR code doesn't connect the device automatically and you need to set up Wi-Fi manually — see Manual Wi-Fi Connection.
- 15–20 minutes — most of it is automated waiting, but don't close the setup screen or put the device to sleep while it runs.
Steps
Part 1: Manual QR Code Enrollment
- Power on the device. On the Welcome screen, tap the screen repeatedly. After a few taps, a hint appears where Emergency call was, counting down ("N more taps to start QR code setup"). Keep tapping — six taps total — until the device's built-in QR code scanner opens.

This is the key difference from the Knox enrollment path, which uses a finger-drawn cross gesture to reach a dedicated Knox Deployment scan screen instead. Here, six taps on the Welcome screen opens the device's own general-purpose QR scanner.
- Scan the enrollment QR code provided by your Apex Edge administrator.
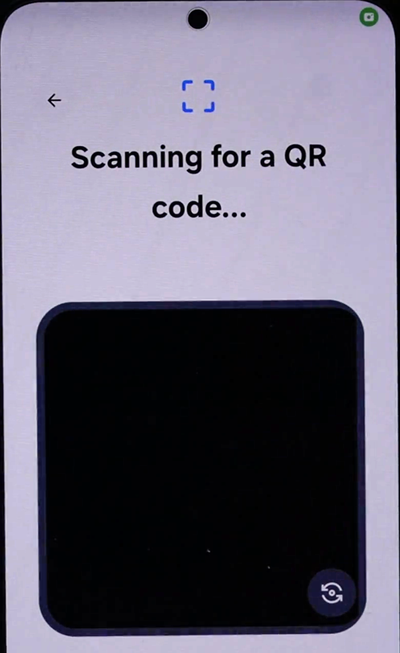
Need a QR code? If you don't have an enrollment QR code, contact support@apexedge.cloud to request one.
QR code won't scan? That usually means the device isn't connected to Wi-Fi. Some QR codes automatically connect the device to a pre-configured Wi-Fi network once scanned; if that doesn't happen for your device, see Manual Wi-Fi Connection to connect manually, then come back and try the scan again.
-
On Set up your phone, tap Continue.
-
Tap Accept and continue to move past the next confirmation screen.
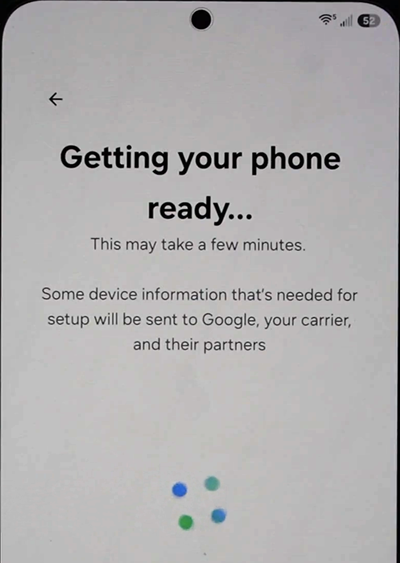
Open item: the screenshot above shows a Getting your phone ready... loading screen — it's not confirmed whether this is the "Set up your phone" screen described above, a different screen in between, or comes right before "Accept and continue." Confirm the exact screen order and wording with Ben.
Part 2: Watchtower Permission Setup
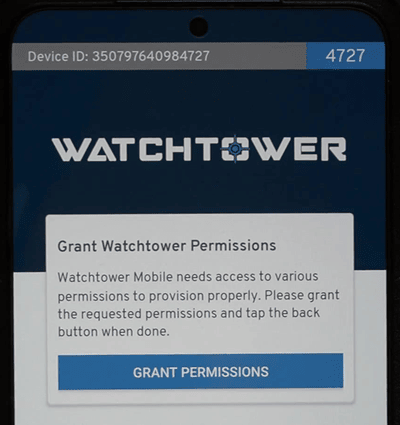
- The device prompts you to grant Watchtower Mobile the permissions it needs. Tap Grant Permissions to begin.
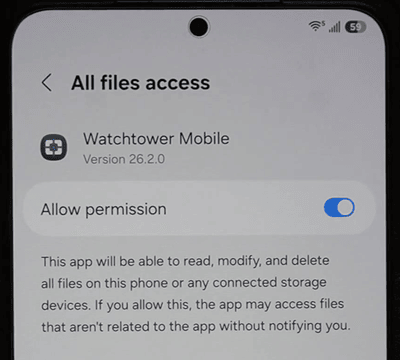
- All files access: turn on Allow permission for Watchtower Mobile, then go back.
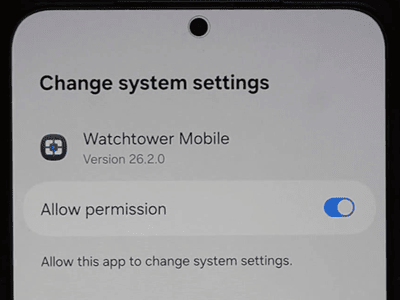
- Change system settings: turn on Allow permission for Watchtower Mobile.
- Swipe your finger from left to right across the screen — repeat until the Accessibility menu opens, then open Installed apps.

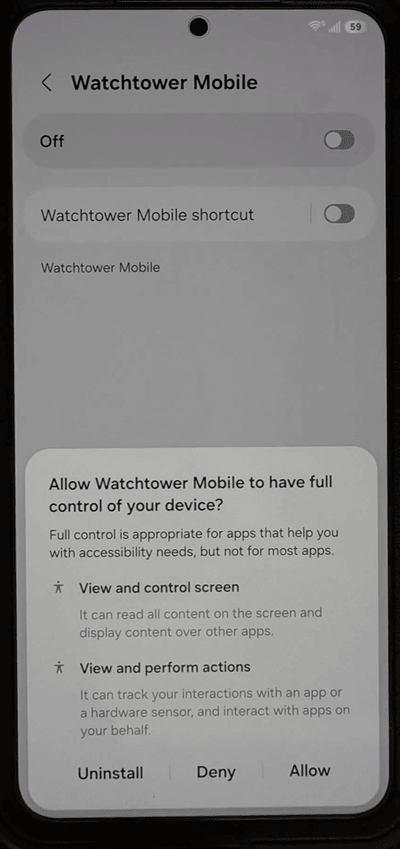
- Under Installed apps, tap Watchtower Mobile, turn its toggle on, and confirm Allow on the "full control of your device" dialog. Go back.
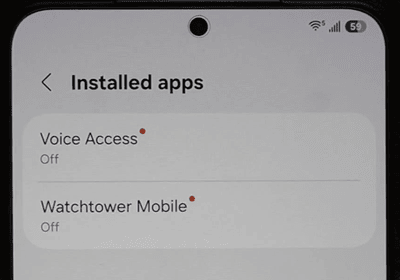
- On the same Installed apps screen, do the same for Voice Access: tap it and turn its toggle on. Go back.
Open item: this recording turns on Voice Access in addition to Watchtower Mobile — the Knox enrollment guide only documents the Watchtower Mobile toggle. Confirm with Ben whether Voice Access is a required step for this enrollment path specifically, or should apply to both.
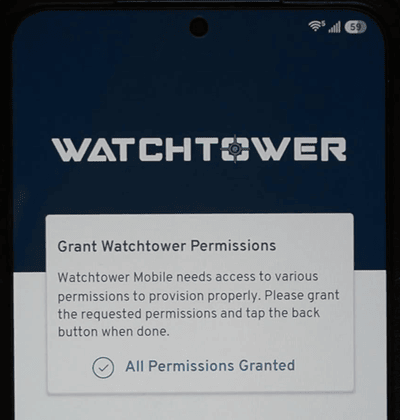
- Go back until you return to the Grant Watchtower Permissions screen, then tap Grant Permissions once more. The screen should now show All Permissions Granted.
Part 3: Google Services
- On Google services, turn on Use location. Leave Allow phone number verification and Send usage and diagnostic data off, then tap Accept to continue.
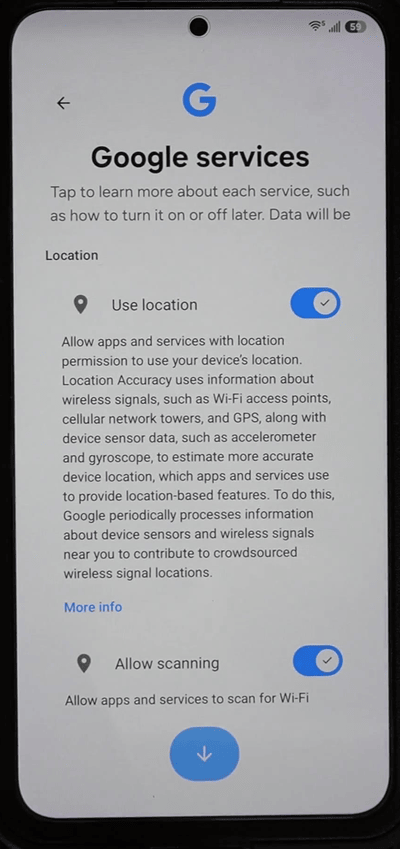
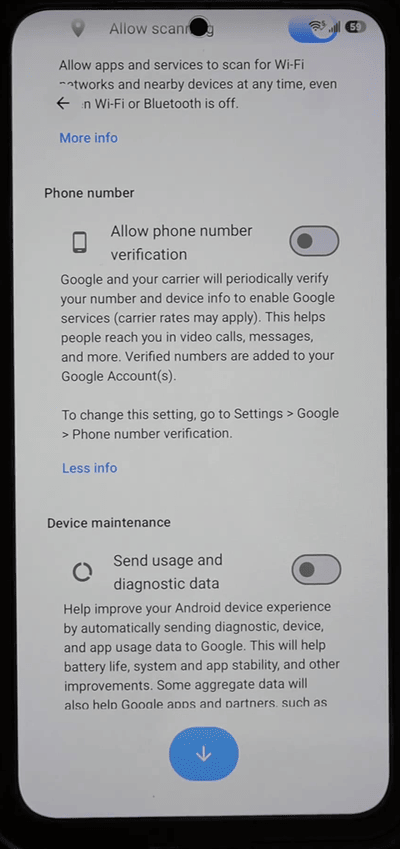
Open item: this recording didn't call out the Allow scanning toggle separately (the Knox guide leaves it on, recommended) — assume the same guidance applies unless Ben says otherwise.
Part 4: Automated App Installation
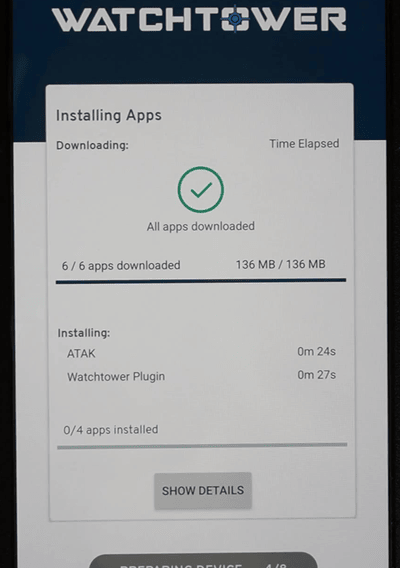
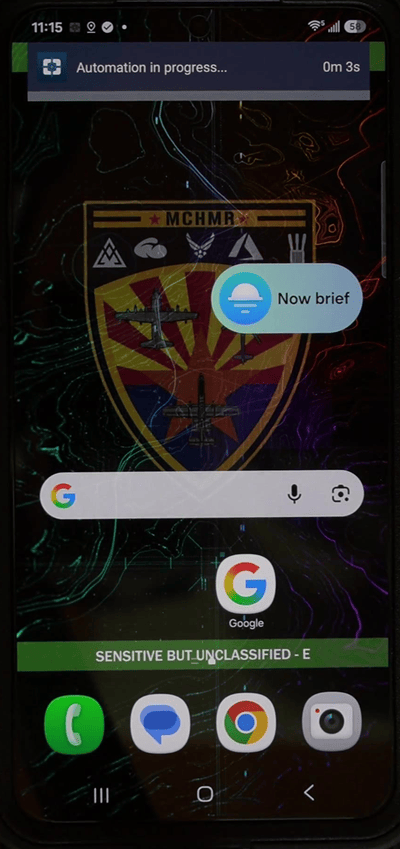
- The device downloads the first six apps and Watchtower's automation begins running. This step is mostly hands-off — an Automation in progress banner tracks elapsed time on the home screen while it works. Do not touch the screen or lock the device during this step.
- If a Screen overlays required dialog appears, tap Open Settings, turn on the display-over-other-apps permission for Watchtower Mobile, then go back. This can appear more than once — repeat as needed.

- If a usage-access prompt appears, tap Open Settings, allow usage access for Watchtower Mobile, then go back.
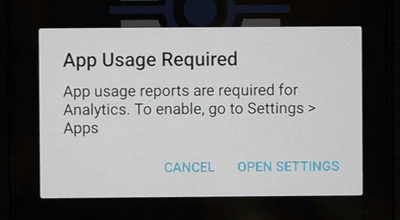
- Once the device shows Automation successfully completed, tap Continue.
From here, this path rejoins the Knox enrollment flow exactly. Continue to How to Install Apps/Plugins for how to install apps from Watchtower's catalog and set up your home screen.
Troubleshooting
- The six-tap gesture doesn't open the QR scanner: make sure you're tapping the same spot on the Welcome screen in quick succession — watch for the "N more taps" hint to confirm the taps are registering. If it still doesn't trigger, restart the device and try again from a fresh boot.
- The QR scan doesn't register: make sure the camera has a clean, well-lit view of the code and hold the device steady a few inches back.
- "Screen overlays required" or a permission prompt keeps reappearing: Watchtower's automation needs each permission granted before it can continue. Open Settings from the dialog, enable the requested permission for Watchtower Mobile, and return to the home screen — repeat if it appears again.
- Automation seems stuck on the home screen: don't lock the device or navigate away while the "Automation in progress" banner is showing. If it doesn't finish after several minutes, restart the device and let Watchtower resume — it picks up where it left off.
- Grant Watchtower Permissions never shows "All Permissions Granted": double check that all permissions in Part 2 are each turned on — a single missed one will block the automation in Part 4.
Related modules
This module is sourced from a Granola meeting transcript ("Watchtower install setup training without Knox," recorded 2026-09-17) plus reference photos of Parts 1–2. A few things are worth confirming with Ben before this leaves in-review:
- Screenshots added for the QR scanner (step 2) and a "Getting your phone ready..." loading screen (steps 3–4) — but the exact screen order and wording for steps 3–4 was inferred from narration and hasn't been matched against the new screenshot yet (see the open item inline above). The Accept and continue screen itself is still unphotographed.
- Voice Access toggle (step 10) — only mentioned in this recording, not in the Knox guide. Confirm whether it's required for both paths.
- "Allow scanning" toggle on the Google services screen — not mentioned in this recording; assumed to match the Knox guide's guidance (left on) pending confirmation.